Make A 2D Game Scene
You now have a player character and the floor. This section will continue adding elements to the game scene, such as platforms and walls. You will learn how to add movement to the player character, allowing the player to jump and move around.
You will also add a goal for the player to achieve, which will be collecting coins on the platforms. Finally, you will learn how to write small scripts so the coins can be collected and so that the total amount of coins collected will be displayed at the top left of the screen.
Prepare the Stage
It would be boring if there was nothing but a floor, right? So let's add some platforms and walls!
-
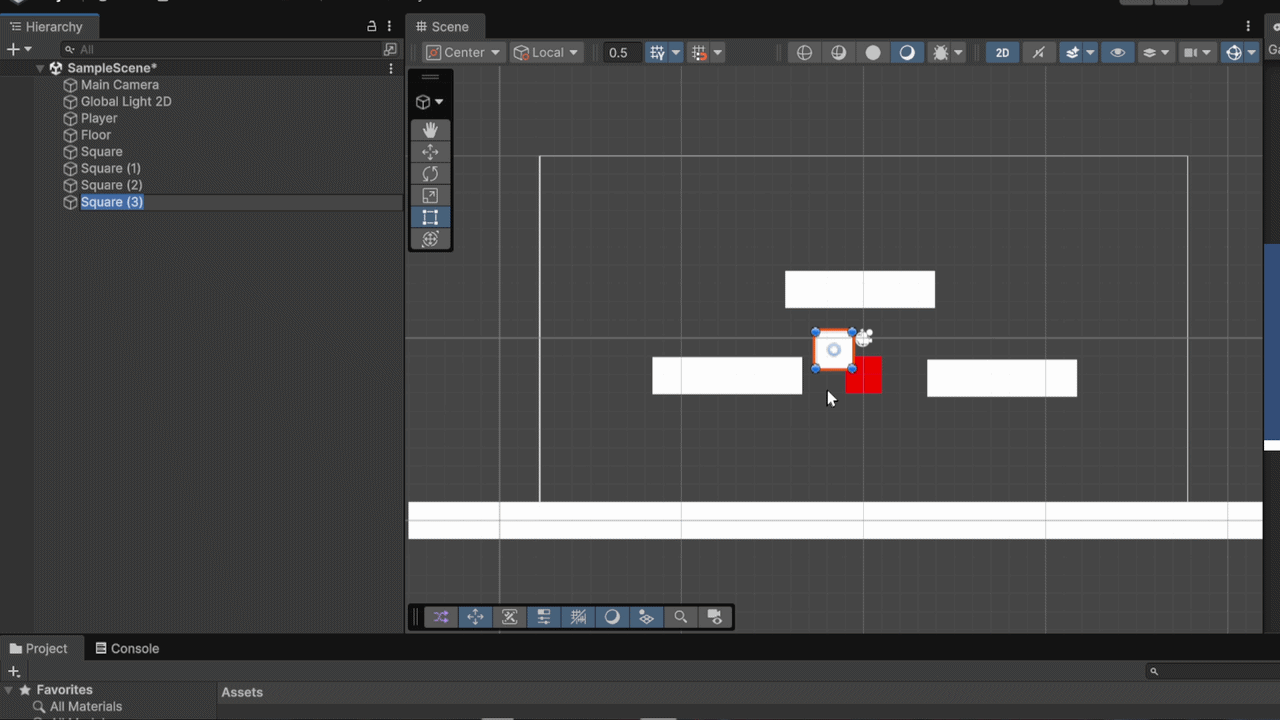
Add 3 more squares and stretch them out.
Tip
Use Ctrl+D to duplicate the platforms in the scene and save time.
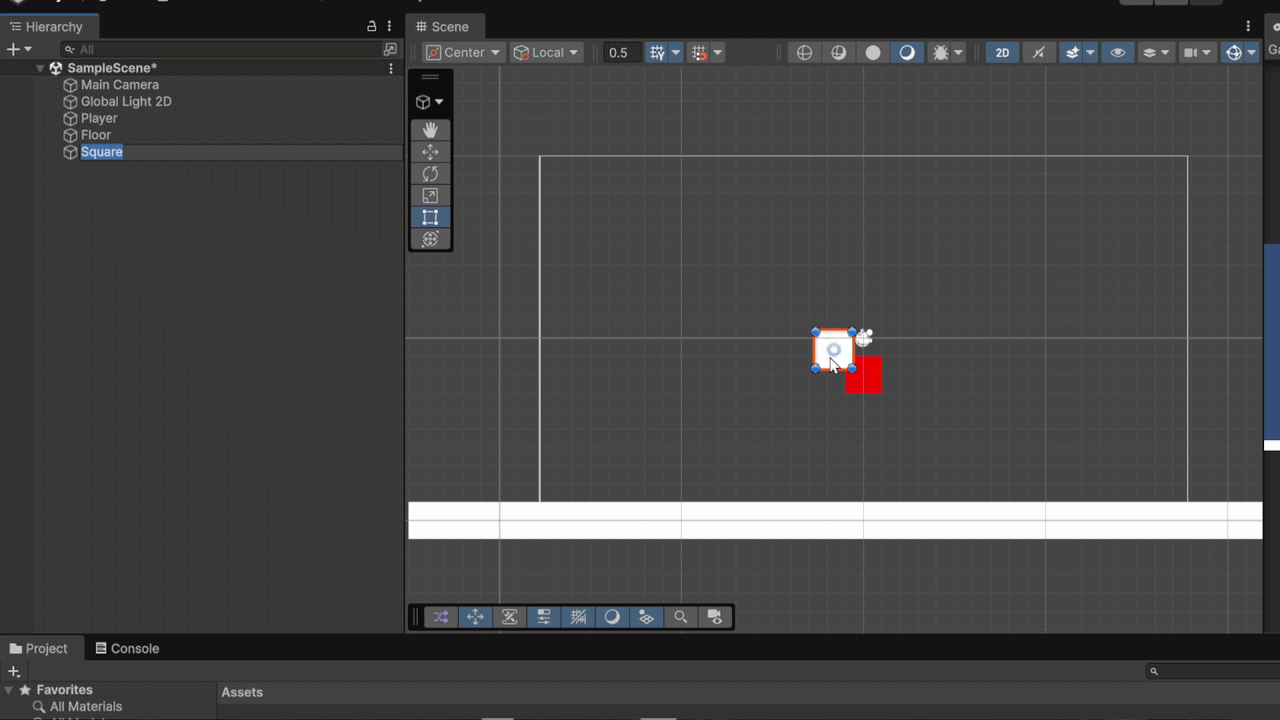
These will be the platforms for the game.
-
Add 2 squares and stretch them out vertically on both sides of the scene.
Reminder on the Camera View
The camera view is represented by a white rectangle in the scene view.
Success

These rectangles will act as walls for this section of the game.
Add Physics to the Player
Unity has a built-in 2D physics system. We can use it to control the player through a Rigidbody2D component. It also takes care of other things for us, like momentum and gravity.
-
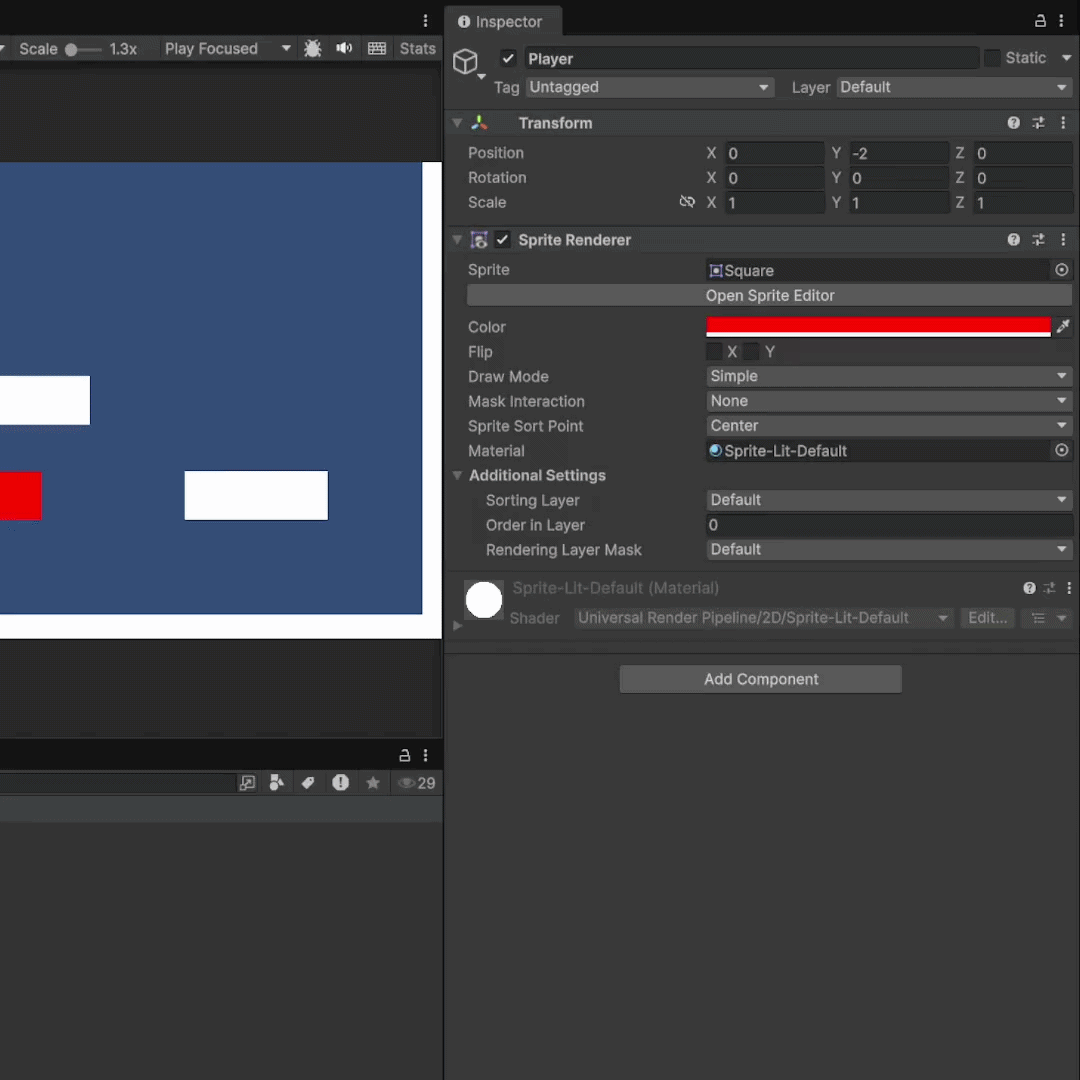
Add a Rigidbody2D component to the red square player sprite.
How to add a component?
Click Add Component in the inspector, under the existing components
-
Check the player's Freeze Rotation Z checkbox in the Rigidbody2D component settings.
Rigidbody2D > Constraints > Freeze Rotation >
 Z
Z
This will ensure that the player character from rolling or spinning when they collide with objects or move around.
-
Press the Play button.
You will see the Player now falls as if there was gravity. They should fall right through the stage. That's because the Rigidbody2D doesn't know the floor is supposed to be solid. For that we will need a Collider.
Add Colliders to Rectangles
-
Select all your platforms, walls, the floor and the player by holding Shift when you select each of them.
-
Add a BoxCollider2D component to all of them.

Now if you hit Play again, the player will fall and land on the floor.
Player Movement
You will now add movement to the player, adding the ability to move and jump.
Add Movement
-
Create a Scripts folder by right clicking anywhere in the Project files section.
Create > Folder
-
Name the folder as
Scripts. -
Enter the
Scriptsfolder by double clicking on it. -
Add a new MonoBehaviour Script called
PlayerMovementto theScriptsfolder.Create > MonoBehaviour Script
-
Add the
PlayerMovementcomponent to your player. -
Open your
PlayerMovementscript by double-clicking it.Info
This action should open Microsoft Visual Studio if you have it correctly installed.
Success
This is what the empty script will look like.
 1
 2
 3
 4
 5
 6
 7
 8
 9
10
11
12
13
14
15
16
using UnityEngine; public class PlayerMovement : MonoBehaviour { // Start is called once before the first execution of Update after the MonoBehaviour is created void Start() { } // Update is called once per frame void Update() { } } -
Place these variables before the functions:
 5
 6
 7
 8
 9
10
11
public Rigidbody2D rb; public float speed = 8f; public float jumpForce = 8f; private float xMovement; private bool isJumping; -
Create a function to read the player input:
1
2
3
4
5
private void GetMovementInput() { xMovement = Input.GetAxis("Horizontal"); isJumping = Input.GetKeyDown(KeyCode.Space); } -
Call your new input function in
Update():1 2 3 4 5
// Update is called once per frame void Update() { GetMovementInput(); } -
Create a function to move the player depending on input:
1
2
3
4
5
private void MovePlayer() { float x = xMovement * speed; rb.linearVelocity = new Vector2(x, rb.linearVelocityY); // (1) }rb.linearVelocityis the velocity of the object
-
Call your new movement function in
FixedUpdate():Fixed Update
Unity recommends using
FixedUpdate()whenever we are dealing with the physics system. UnlikeUpdate(), which runs every frame possible,FixedUpdate()will only run 30 times per second. This function is meant to work alongsideUpdate().1 2 3 4
private void FixedUpdate() { MovePlayer(); } -
Create a function to calculate your jump:
1 2 3 4 5 6 7
private void Jump() { if (isJumping) { rb.linearVelocity = new Vector2(rb.linearVelocityX, jumpForce); } } -
Add your new jump function to
Update():1 2 3 4 5 6
// Update is called once per frame void Update() { GetMovementInput(); Jump(); }
That's all for the player movement script. This is what the completed file should look like:
PlayerMovement script
using System;
using UnityEngine;
public class PlayerMovement : MonoBehaviour
{
public Rigidbody2D rb;
public float speed = 8f;
public float jumpForce = 8f;
private float xMovement;
private bool isJumping;
// Start is called once before the first execution of Update after the MonoBehaviour is created
void Start()
{
}
// Update is called once per frame
void Update()
{
GetMovementInput();
Jump();
}
private void FixedUpdate()
{
MovePlayer();
}
private void GetMovementInput()
{
xMovement = Input.GetAxis("Horizontal");
isJumping = Input.GetKeyDown(KeyCode.Space);
}
private void MovePlayer()
{
float x = xMovement * speed;
rb.linearVelocity = new Vector2(x, rb.linearVelocityY);
}
private void Jump()
{
if (isJumping)
{
rb.linearVelocity = new Vector2(rb.linearVelocityX, jumpForce);
}
}
}
Test Your Movement Script
-
Save your changes in Visual Studio by pressing Ctrl+S.
-
Minimize Visual Studio.
-
Save your Unity project by pressing Ctrl+S.
Before testing the movement, we have to assign a value to the Rigidbody2D rb variable
-
In the inspector, drag and drop the
[Rigidbody2D][rb2d-glossary]component to the corresponding field inPlayerMovement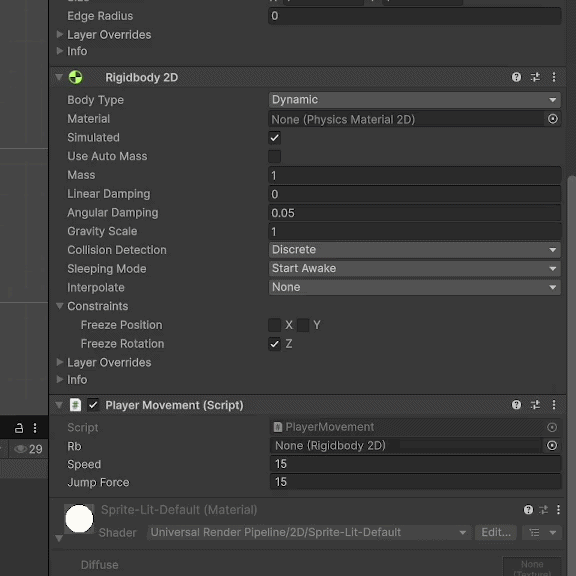
-
Hit Play and try moving the player around!
Info
Use Space to jump and use the arrow keys or WASD to move around.
Feel free to change the
speedandjumpForcevariable values, as well as theRigidbody2D's gravity scale in the inspector to your liking.Tip
You can change your script variable values directly from the inspector

-
Pause the Play button before moving on to the next step.
Add a Goal
Every game has a goal or victory condition that means the player has won once they have achieve that. Let's add that now. We will create coins that players can collect. Once they have collected every coin, they win the game.
Create Coins
-
Add a circle sprite to the scene.
2D Object > Sprite > Circle
-
Change it to a golden color in the coin's Inspector window.
-
Rename the circle to "Coin".
-
Duplicate the coins until there are 2 on top of each platform.
Tip
Use Ctrl+D to duplicate the platforms in the scene and save time.
Success

Create Coins User Interface (UI)
-
Add a text object to the scene by right clicking in the Hierarchy window.
UI (Canvas) > Text - TextMeshPro
You will get a pop-up to download TextMeshPro (TMP) essentials.
-
Click Import TMP Essentials.
-
Close the TMP Importer window without importing the examples and extras.
Success
You should see a TextMesh Pro folder in your Project Files.

-
Change the default text color to black in the Inspector. Since the walls and platforms are white, black will contrast well with them.
Tip
The best way to preview how the UI looks is through the Game view instead of the Scene view.
-
Switch to the Game view.
-
Change the preview resolution from "Free Aspect" to "16:9 Aspect" at the top of the Game view.
This will force the display to a standard widescreen format, allowing you to view how the game would look on modern displays.
-
Change back to Scene view.
-
Click the Canvas button in the Hierarchy window.
-
Find the
Canvas Scalercomponent in the Inspector window. -
Change the UI Scale Mode from Constant Pixel Size to Scale With Screen Size.
-
Set your reference resolution to X=1920, Y=1080.
Success

-
Double-click Canvas in the Hierarchy window.
This will zoom you out to where you can see your whole canvas.
-
Drag the text object you made (Text-tmp under Canvas in the Hierarchy window) to the top-left corner of the canvas.
Success
This is whjat it should look like in the Game view.

This text will help us dynamically display the player's score.
Track the Score
-
Give all coins a
BoxCollider2Dcomponent in the Inspector tab.Info
If your scene view is still zoomed out, the objects you have are in the bottom left corner, zoom there if you want to select your coins from there.
Tip
You can add a component to many objects at once by holding shift when selecting the items and then adding the component.
-
Turn the collider into a Trigger by checking the Is Trigger box in all the coins'
BoxCollider2Dcomponent settings.
-
Create a new empty object by right-clicking anywhere in the Hierarchy window and clicking Create Empty.
-
Name your empty object "CoinManager".
-
Drag and drop all coins into the CoinManager object.
Success

Create CoinManager Script
-
Go into your "Scripts" folder in your Project files.
-
Create a MonoBehaviour script called
CoinManager.Create > MonoBehavour Script
-
Add the
CoinManagerscript component to the CoinManager object's Inspector window. -
Open the CoinManager script by double-clicking on it.
-
Delete the
Update()function since we won't need it. -
Declare the variables we will need:
5 6
private int score; private int totalCoins; -
Dynamically get the amount of coins:
8 9 10 11 12
// Start is called once before the first execution of Update after the MonoBehaviour is created void Start() { totalCoins = transform.childCount; }Success
1 2 3 4 5 6 7 8 9 10 11 12 13
using UnityEngine; public class CoinManager : MonoBehaviour { private int score; private int totalCoins; // Start is called once before the first execution of Update after the MonoBehaviour is created void Start() { totalCoins = transform.childCount; } } -
Save your changes by pressing Ctrl+S.
-
Minimize Visual Studio.
-
Save your Unity project by pressing Ctrl+S.
Coin Script
-
Go into your "Scripts" folder in your Project files.
-
Create a MonoBehaviour script called
Coin.Create > MonoBehavour Script
-
Add the
Coinscript to all the coins.Tip
You can add a component to many objects at once by holding shift when selecting the items and then adding the component.
-
Open the
Coinscript file. -
Delete the
Update()method fromCoin. -
Assign the
CoinManagertoCoinin theStart()method:7 8 9 10
void Start() { coinManager = transform.parent.GetComponent<CoinManager>(); } -
Add a variable to hold the CoinManager:
1 2 3 4 5 6 7 8 9 10 11 12
using UnityEngine; public class Coin : MonoBehaviour { public CoinManager coinManager; // Start is called once before the first execution of Update after the MonoBehaviour is created void Start() { } } -
Add a function to add to score in the
CoinManagerscript:14 15 16 17 18
public void addToScore(int add = 1) { score += add; Debug.Log("Score: " + score); } -
Create an
OnTriggerEnter2Dfunction:12 13 14 15
private void OnTriggerEnter2D(Collider2D collision) { } -
When the player enters the coin trigger, increase the score in
CoinManagerand remove the coin:12 13 14 15 16
private void OnTriggerEnter2D(Collider2D collision) { coinManager.addToScore(); Destroy(gameObject); } -
Save your changes by pressing Ctrl+S.
Success
Completed coin script:
1 2 3 4 5 6 7 8 9 10 11 12 13 14 15 16 17
using UnityEngine; public class Coin : MonoBehaviour { public CoinManager coinManager; void Start() { coinManager = transform.parent.GetComponent<CoinManager>(); } private void OnTriggerEnter2D(Collider2D collision) { coinManager.addToScore(); Destroy(gameObject); } }Success
CoinManager script at this point:
1 2 3 4 5 6 7 8 9 10 11 12 13 14 15 16 17 18 19 20 21 22 23 24
using UnityEngine; public class CoinManager : MonoBehaviour { private int score; private int totalCoins; public void addToScore(int add = 1) { score += add; Debug.Log("Score: " + score); if (score >= totalCoins) { Debug.Log("You win!"); } } // Start is called once before the first execution of Update after the MonoBehaviour is created void Start() { totalCoins = transform.childCount; } }When the score is equal to the amount of coins, the player collected them all and they win!
16 17 18 19 20 21 22 23 24 25
public void addToScore(int add = 1) { score += add; Debug.Log("Score: " + score); if (score >= totalCoins) { Debug.Log("You win!"); } } -
Save your changes in Visual Studio by pressing Ctrl+S.
Now your game can be won! Let's update the UI to show the score.
Update Score UI
-
Declare a public
TextMeshProUGUIvariable at the top of yourCoinManagerscript file.4public TextMeshProUGUI scoreLabel; -
Update the
addScorefunction to update the score.16 17 18 19 20 21 22 23 24 25
public void addToScore(int add = 1) { score += add; scoreLabel.SetText(score.ToString()); if (score >= totalCoins) { Debug.Log("You win!"); } } -
Save your changes by pressing Ctrl+S.
Success
1 2 3 4 5 6 7 8 9 10 11 12 13 14 15 16 17 18 19 20 21 22 23 24 25 26
using TMPro; using UnityEngine; public class CoinManager : MonoBehaviour { public TextMeshProUGUI scoreLabel; private int score; private int totalCoins; void Start() { totalCoins = transform.childCount; } public void addToScore(int add = 1) { score += add; scoreLabel.SetText(score.ToString()); if (score >= totalCoins) { Debug.Log("You win!"); } } } -
Minimize Visual Studio.
-
Drag and drop the text label in your scene's canvas into the
Score Labelslot in theCoinManagercomponent, in the Inspector window.Success

-
Save your Unity project by pressing Ctrl+S.
-
Run the game and collect all coins.
Once you collect all the coins, the console tab at the bottom should say "You win!".
Conclusion
You should now have platforms and walls for your game scene, with coins on each of the platforms. The player character should be able to move around and jump, and the score at the top left should keep track of how many coins you have. The console log should also print out a message when the player has collected all the coins.
See below for what your game view should look like after completing this section:
Success
