Set Up Project
Now that you have the editor installed, there are just a few more things to set up before you can add elements to your game.
Enabling the Legacy Input System
First, you need to activate the legacy input system.
Warning
The legacy input system is easier to use for beginners, but it will be deprecated in future versions. Once you get more comfortable with the engine, switching to the new input system is strongly recommended.
-
In the menu bar, select Project Settings.
Edit > Project Settings
-
Search for "Input" using the searchbar in the top-right corner of Project Settings.
-
In the left-hand sidebar of the Project Settings window, select the Player category.
-
Scroll down and open the Other Settings dropdown.
-
Scroll down to the Other Settings section to find the section labeled as Active Input Handling.
-
Look for the Configuration subheading to find the Active Input Handling dropdown menu.
-
Click the dropdown and select Both.
Unity will prompt you to restart the editor to apply these changes.
-
Click Apply to restart the editor.
Create the Player and Floor
Now you can start adding objects. This section will guide you through adding shapes to your game. You will add 2 squares, one representing the player, and another representing the floor. Ensure that the editor is on the Scene view instead of the Game view. We will start with the player first.
Player
-
Add a square sprite to the scene from the Hierarchy tab's + button:
2D Objects > Sprites > Square

-
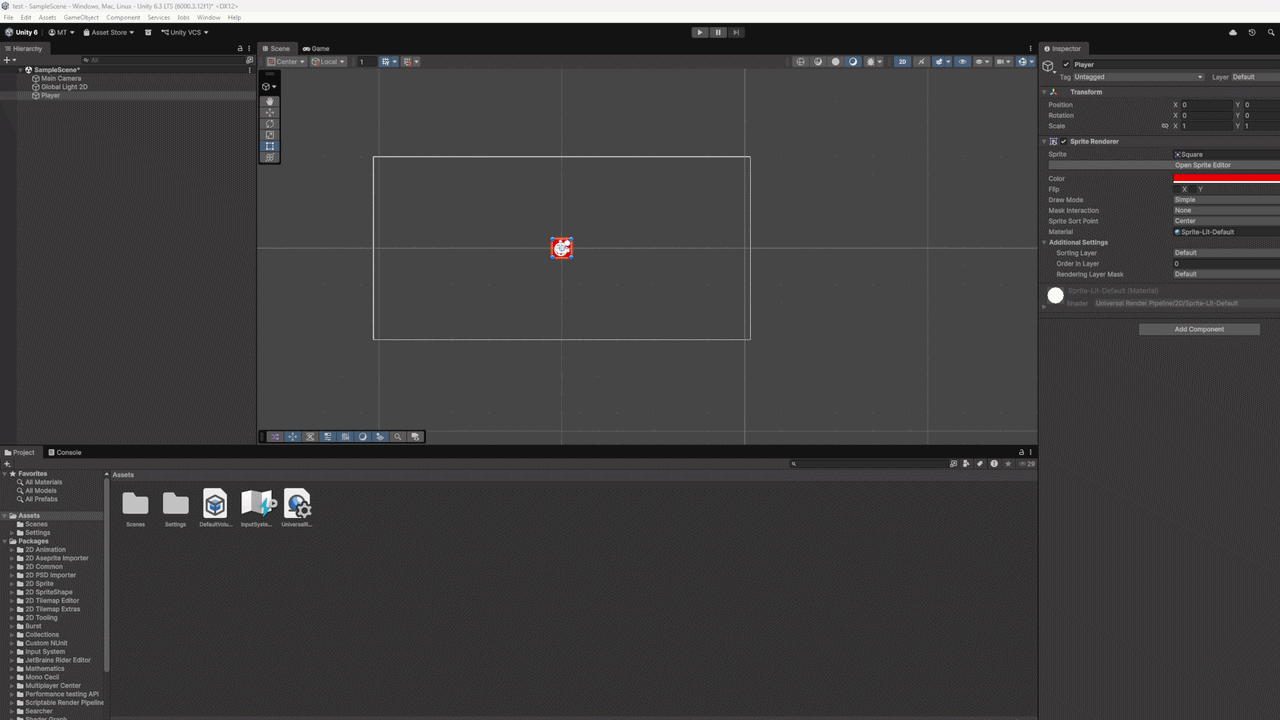
Rename the square to "Player" in the Inspector tab on the right.
-
Change the sprite's color to red in the Inspector tab.
Success

-
Add another square sprite to the scene.
Floor
Now that you have a player character, you will add a floor for them to stand on.
-
Add another square sprite to the scene.
2D Objects > Sprites > Square
-
Name the second sprite "Floor" in the Inspector tab.
-
In the scene view, stretch it using your cursor into a rectangle shape.
Conclusion
You have now learned how to add shapes to your project, with the red square representing the player character and the white rectangle at the bottom representing the floor.
See below for what your screen should look like after completing this section:
Success
